Do-It-Yourself Steps to Follow
Do-It-Yourself Survey - The Steps to Follow
While a professional home energy audit is the best way to determine where your home is losing energy and where you can save energy and money, you can conduct your own simple but diligent walk-through and spot many problems in any type of house. This "do-it-yourself" home energy survey will not be as thorough as a professional home energy assessment, but it can help you pinpoint some of the easier areas to address. When walking through your home, keep a checklist of areas you have inspected and problems you found. This list will help you prioritize your energy efficiency upgrades and help you determine if you need a professional assessment.
Locate Air Leaks
First, make a list of obvious air leaks (drafts). The potential energy savings from reducing drafts in a home may range from 5% to 30% per year, and the home is generally much more comfortable afterward.
Check for indoor air leaks, such as gaps along the baseboard or edge of the flooring and at junctures of the walls and ceiling. Also check for leaks on the outside of your home, especially in areas where two different building materials meet as well as windows and doors. Read More:
Seal Air Leaks
You should plug and caulk holes or penetrations for faucets, pipes, electric outlets, and wiring. Look for cracks and holes in the mortar, foundation, and siding, and look for leaks around windows and doors. Seal them with the appropriate material. You can learn more about selecting and applying caulk and weatherstripping from our Articles & Tips section. Read More:
Consider Ventilation
When sealing any home, you must always be aware of the danger of indoor air pollution and combustion appliance "backdrafts." Backdrafting is when the various combustion appliances and exhaust fans in the home compete for air. An exhaust fan may pull the combustion gases back into the living space. This can obviously create a very dangerous and unhealthy situation in the home. Carbon monoxide is known as the silent killer, so your house should have a CO detector within 15 feet of any room used for sleeping.
In homes where a fuel is burned (i.e., natural gas, fuel oil, propane, or wood) for heating, be certain the appliance has an adequate air supply. Generally, one square inch of vent opening is required for each 1,000 Btu of appliance input heat. When in doubt, contact your local utility company, energy professional, or ventilation contractor. Read More:
Check Insulation
Heat loss through the ceiling and walls in your home could be very large if the insulation levels are less than the recommended minimum. When your house was built, the builder likely installed the amount of insulation recommended at that time. Given today's energy prices (and future prices that will probably be higher), the level of insulation might currently be inadequate, especially if you have an older home.
If the attic hatch is located above a conditioned space, check to see if it is at least as heavily insulated as the attic, is weather stripped, and closes and seals tightly. In the attic, determine whether openings for items such as pipes, ductwork, and chimneys are sealed. Seal any gaps with an expanding foam caulk or some other permanent sealant.
While you are inspecting the attic, check to see if there is a vapor barrier under the attic insulation. The vapor barrier might be tar paper, Kraft paper attached to fiberglass batts, or a plastic sheet. If there does not appear to be a vapor barrier, you might consider painting the interior ceilings with vapor barrier paint. This reduces the amount of water vapor that can pass through the ceiling. Large amounts of moisture can reduce the effectiveness of insulation and promote structural damage.
Make sure that the attic vents are not blocked by insulation. Insulatin baffels allow the air to flow thru the structure without moving the insulatino out of the way as the air moves thru. You also should seal any electrical boxes in the ceiling with flexible caulk (from the living room side or attic side) and cover the entire attic floor with at least the current recommended amount of insulation. Typically in this area it will run between R-30 to R-38. Higher elevations can require more.
Checking a wall's insulation level is more difficult. Select an exterior wall and turn off the circuit breaker or unscrew the fuse for any outlets in the wall. Be sure to test the outlets to make certain that they are not "hot." Check the outlet by plugging in a functioning lamp or portable radio. Once you are sure your outlets are not getting any electricity, remove the cover plate from one of the outlets and gently probe into the wall with a thin, long stick or screwdriver. If you encounter a slight resistance, you probably have some insulation there. You could also make a small hole in a closet, behind a couch, or in some other unobtrusive place to see what, if anything, the wall cavity is filled with. Ideally, the wall cavity should be totally filled with some form of insulation material. Unfortunately, this method cannot tell you if the entire wall is insulated, or if the insulation has settled. Only a thermographic inspection can do this.
If your basement is unheated, determine whether there is insulation under the living area flooring. In most areas of the country, an R-value of 25 is the recommended minimum level of insulation to be placed in the floor above the unheated area. The insulation at the top of the foundation wall and first floor perimeter should have an R-value of 19 or greater. If the basement is heated, the foundation walls should be insulated to at least R-13. Your water heater, hot water pipes, and furnace ducts should all be insulated with the foam style insulatin and taped. Read More:
Inspect Heating and Cooling Equipment
Inspect heating and cooling equipment annually, or as recommended by the manufacturer. If you have a forced-air furnace, check your filters and replace them as needed. Generally, you should change them about once every month or two, especially during periods of high usage. Have a professional check and clean your equipment once a year. Consider using re-usable furnace filters. They cost a little more initially,but can be removed, washed and replaced.
If the unit is more than 15 years old, you should consider replacing your system with one of the newer, energy-efficient units. A new unit would greatly reduce your energy consumption, especially if the existing equipment is in poor condition. Check your ductwork for dirt streaks, especially near seams. These indicate air leaks, and they should be sealed with a duct mastic. Insulate any ducts or pipes that travel through unheated spaces. An insulation R-Value of 6 is the recommended minimum. Also check your heat vents for dark spots or streaks. This can be a sign that your heat exchanger is cracked and allowing soot to travel thru the system. Read More:
Lighting
Energy for lighting accounts for about 10% of your electric bill. Examine the light bulbs in your house and consider replacing inefficient bulbs with a more efficient choice, such as energy-saving incandescent, compact fluorescent lamps (CFLs), or light-emitting diodes (LEDs). When shopping for bulbs, consider the brightness of the bulbs you want and look for lumens and the Lighting Facts label. Your electric utility may offer rebates or other incentives for purchasing energy-efficient lamps. Read More:
Appliances and Electronics
The appliances and electronics you choose and how you use them affect your energy use and costs. Examine the appliances and electronics in your home and estimate their energy use. Consider strategies for reducing the energy use of your appliances and electronics.
- You might consider the following:
- Unplugging an item when it is not in use to prevent phantom loads
- Changing the settings or using the item less often
- Purchasing a new, more efficient product. Learn more about shopping for efficient appliances and electronics.
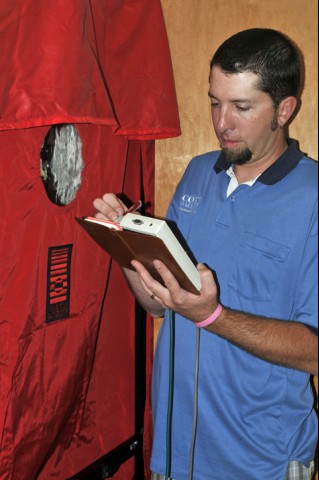
- Professional Home Energy Assessment
Once you have finished your do-it-yourself audit, consider calling in Colorado Energy Analysts to complete a more thorough assessment. Your self-assessment can help our auditor better analyze your home and potential areas for saving. Contact Colorado Energy Analysts to learn more about professional home energy assessments. Read More:
Jon Howes
Professionally Certified
BPI Certified Building Analysts
RESNET Certified HERS Rater
RRP - Certified Lead Paint Renovator
Colorado Energy Analysts
Certified Energy Rater
Scott Homes, Ltd., Designers & Builders
Construction Superintendent
 |
 |
Schedule An Inspection
By Phone or Email we can schedule the services you desire to begin saving money on your utility bills!
Contact Us Online
Email us at info@ColoradoEnergyAnalysts.com
© Copyright 2013-2024 - Colorado Buys Local Inc | Designed for Colorado Energy Analysts